About a year and a half ago, it was time to find a big girl bed for Lulu. We’d long ago taken the side of the crib off so that she could sleep toddler bed style, but she kept falling out (poor girl). After a big bruise on the noggin, we knew it was high time for a different sleeping arrangement.
So I hopped onto Pinterest to see what’s out there, and I came across this loverly pin from Gail. A few more minutes of clicking led me to this pin, and I was definitely hooked.
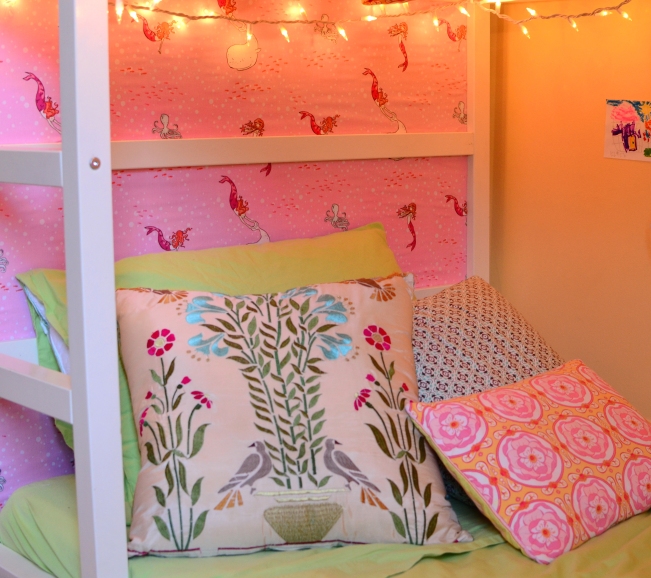
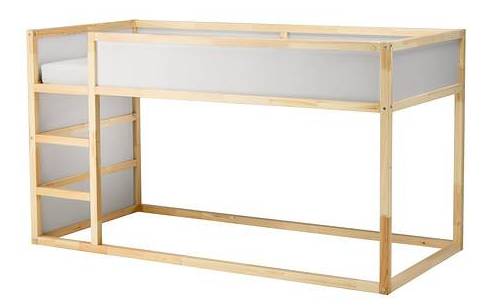
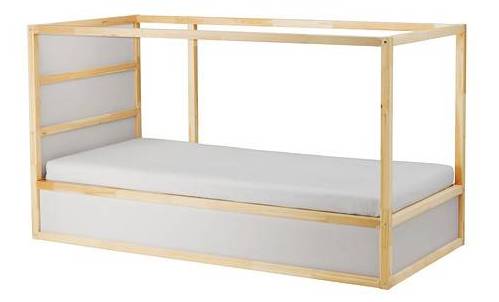
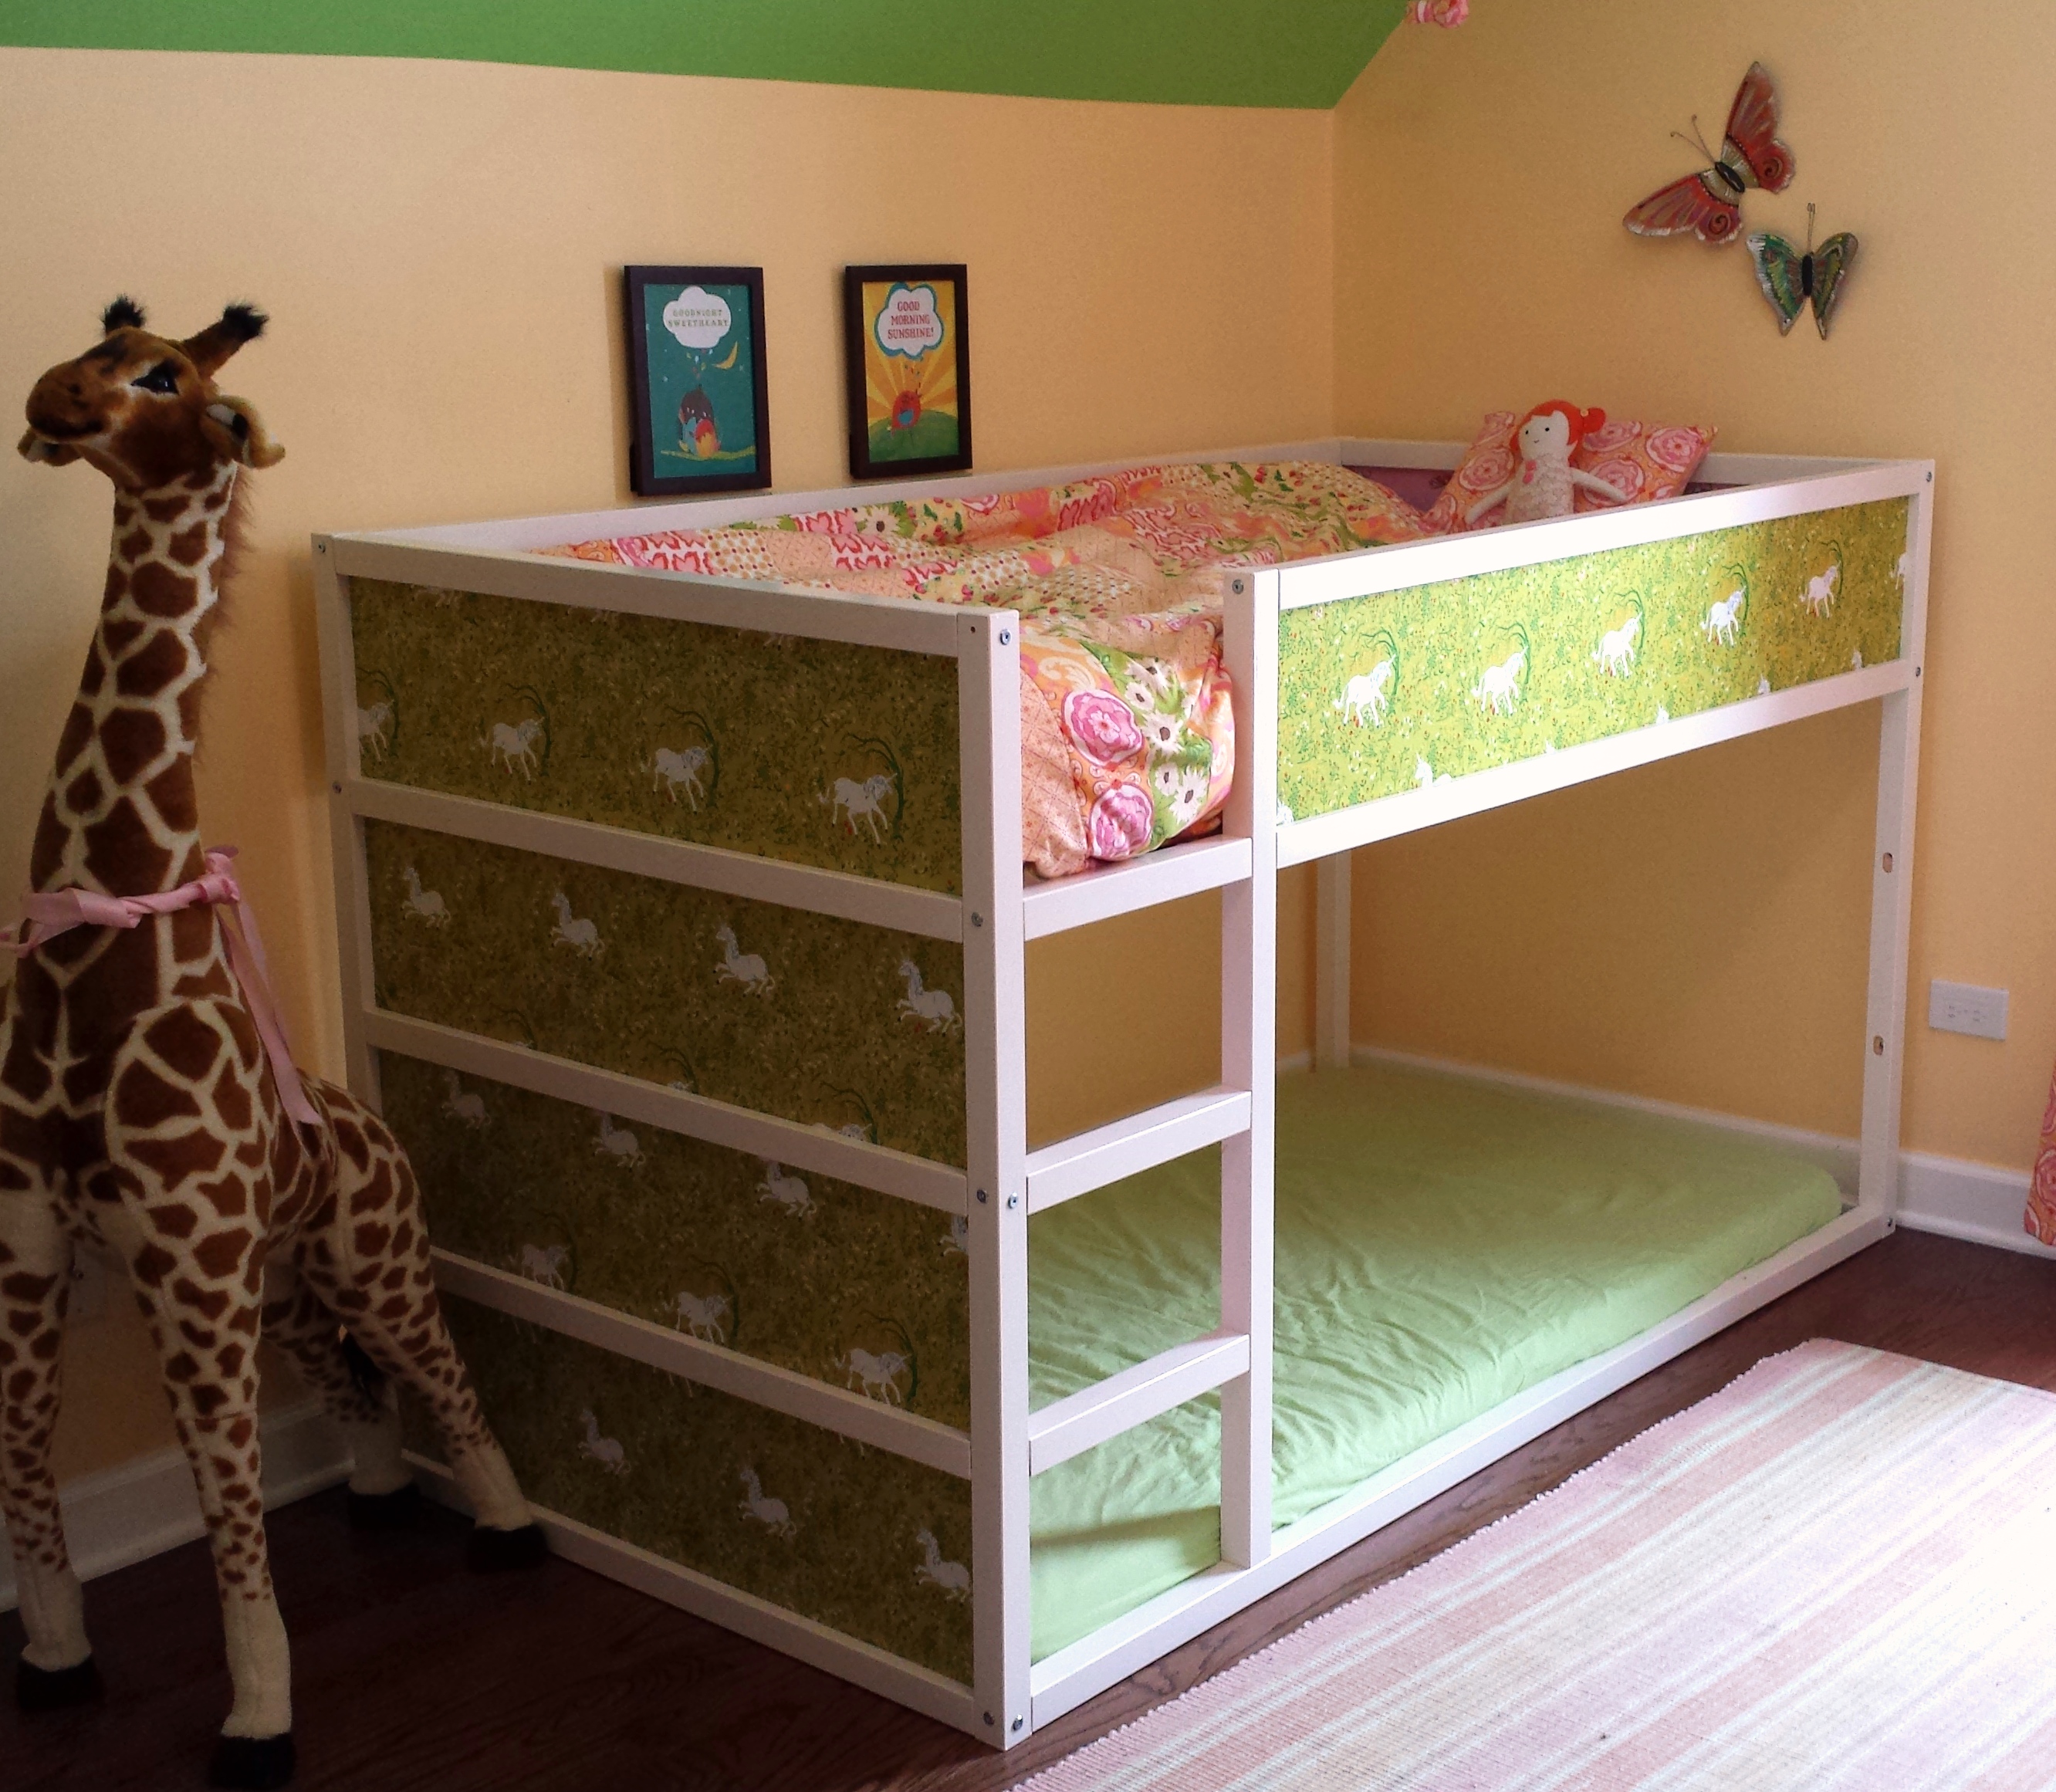
The Ikea Kura Bunk Bed. It’s such a great idea. The draw for me was a combination of cuteness, creative possibility and an opportunity for Lulu to sleep in a bed that is essentially a mattress on the floor with no possibility of falling out. The other plus is that Lulu’s room is smaller than Kiki’s, and a bed like this gives more playing space in a small room.
If you want to be amazed, check out this Pinterest search filled to the brim with about a zillion genius hacks on this bed.
Of course I couldn’t just buy this bed, assemble it and call it a day like a normal person. That would be way too easy and economical. I had to customize.
And, of course I couldn’t stop with just one bed. Kiki wanted in on the action, too. Who wouldn’t, really. Customizing an awesome bed for her sister and not for her seemed cruel. So two beds it was.
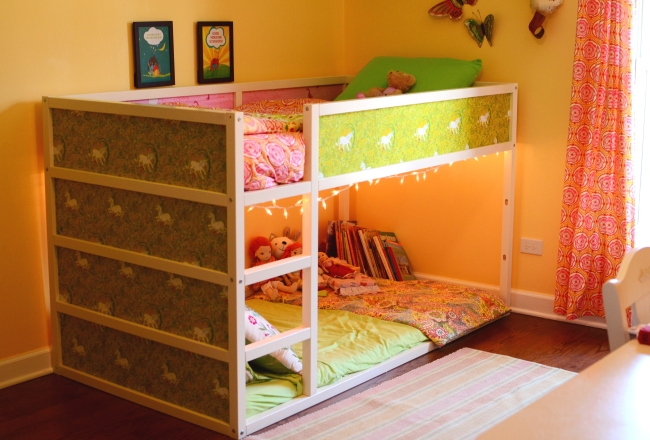
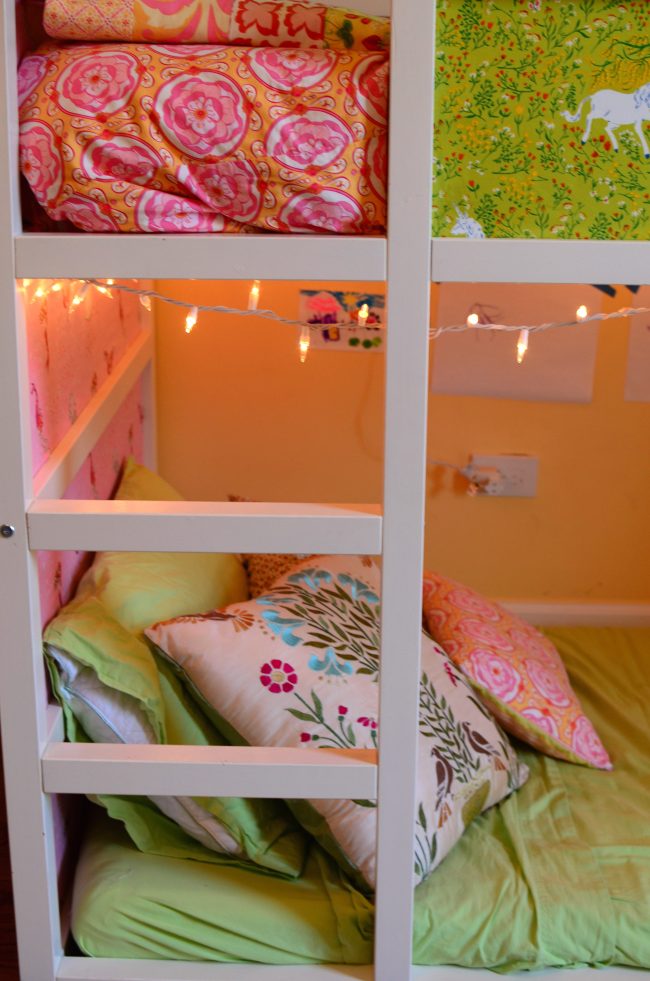
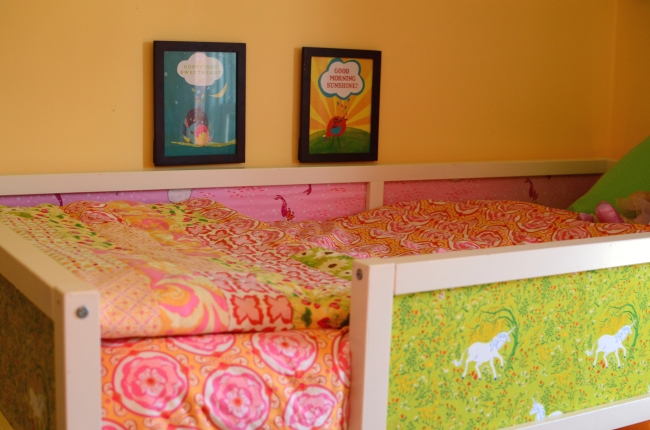
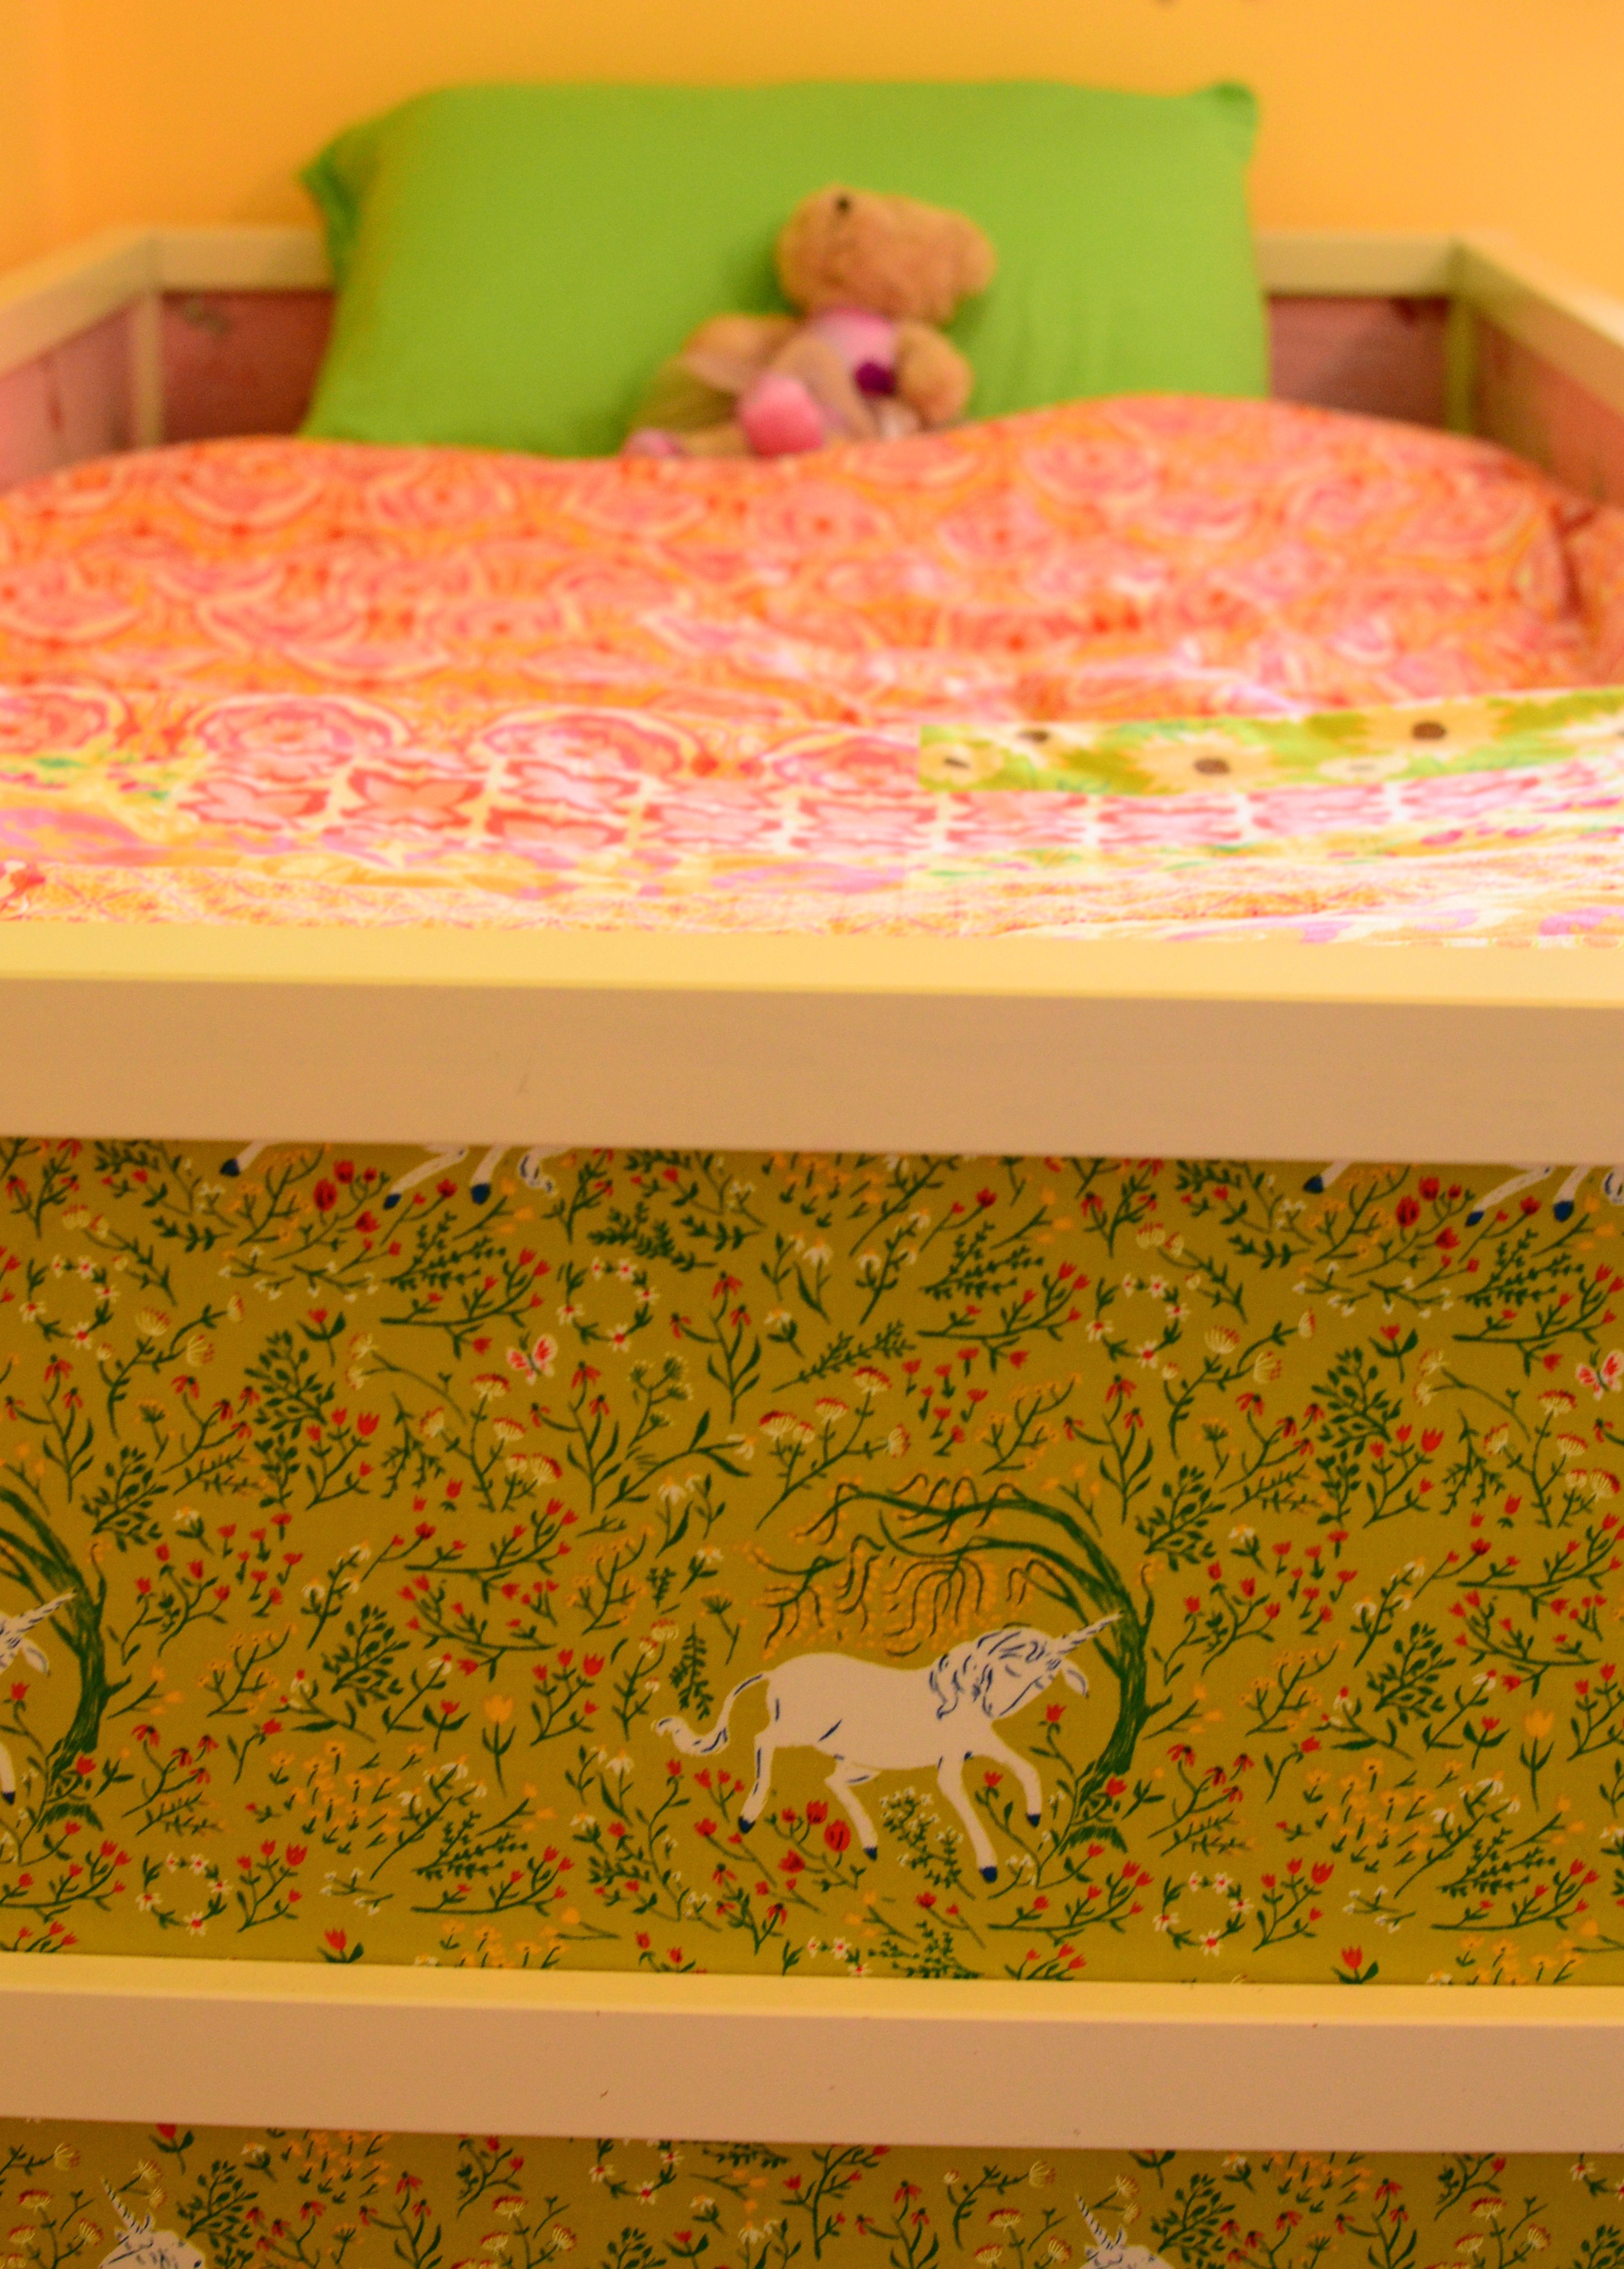
I decided right away that I wanted to paint the frames white, and that I wanted to cover the panels with fabric. I gave both girls a carefully curated selection of fabrics to choose from. Lulu chose Sarah Jane’s Wee Wander Summer Nights in twilight and On Parade, and Kiki chose Heather Ross’ Far Far Away Unicorns in green and Sarah Jane’s Out to Sea Mermaids in blossom.
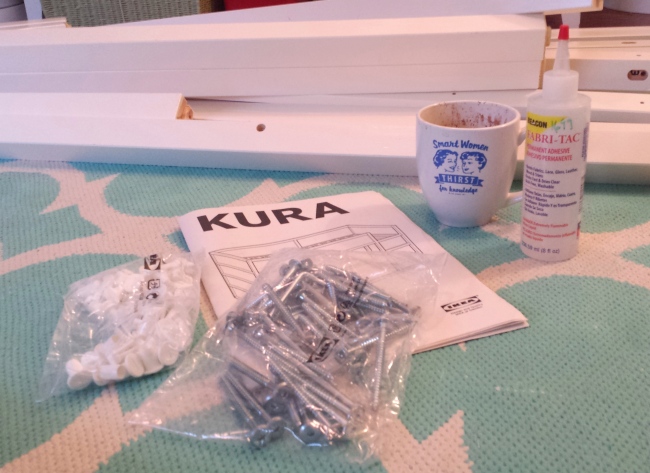
My husband watched the kids while I drove out to Ikea and bought the beds. When I got them home and opened the boxes, I was completely horrified by the number of frame pieces that required sanding, priming and painting for two beds (if I really wanted the beds to be white, which I did.) The girls would be in high school before I’d ever finish this painting.
Emergency Distress Call to Handyman #1 — Dear Handyman, can you please, please, please sand, prime and paint all 100,000 pieces of bed frame and save me countless hours and frustration, as I’m not really that good at it myself??? Answer — yes.

Ok, so a couple days later, I have a huge pile of freshly painted bed pieces up in Lulu’s bedroom. Time to finish up my cappuccino, roll up my sleeves and get crackin.
Here’s how I did it . . .
The way this bed works is that it’s basically a wood frame with thin fiberboard panels that slide into groovess in the frame. The first thing to do, then, is to cover your panels with fabric (or wallpaper or whatever).
Survival Tip #1 — You’ll notice that some of the wood frame pieces are labeled with numbers. If you decide to paint your frame, be sure to write in your numbers in Sharpie. If you don’t, you might end up killing yourself when it’s time to put the thing together.

I got myself some good fabric glue.

As you can see, it’s not cheap. But in this case, I think you’ve got to use the good stuff.
Next, I cut my fabric about one inch wider than the first panel on all sides. Then, I squeezed on that glue.
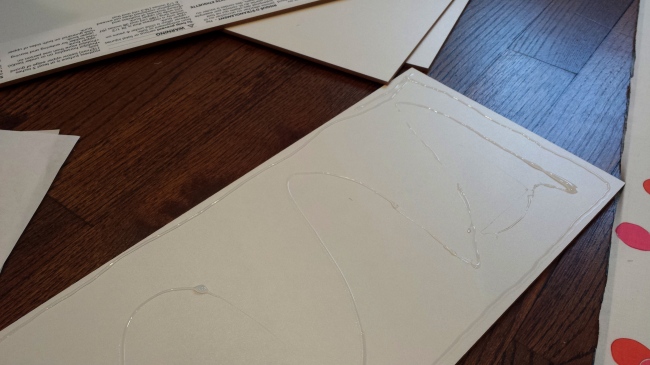
Then, I adhered my fabric onto the panel, making sure to smooth it out really thoroughly and tightly. It should look something like this . . .

Next, I trimmed the fabric so that I could glue the fabric to the edges of the panel without overhang.
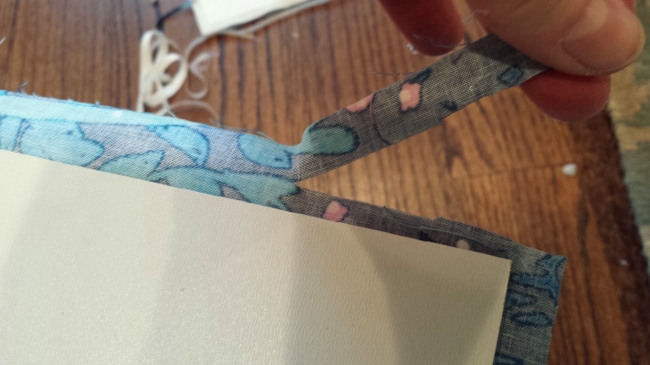
Then, I squeezed glue along the top, bottom and side edges of the panel and folded the fabric over, faking it on the corners. I think I ended up trimming the fabric on the corners to avoid excess bulk.

Then, I repeated the same thing on the other side of the panel. I ended up with this.

After covering all seven panels, it was time to assemble the thing. I’m sure you know what that’s like.
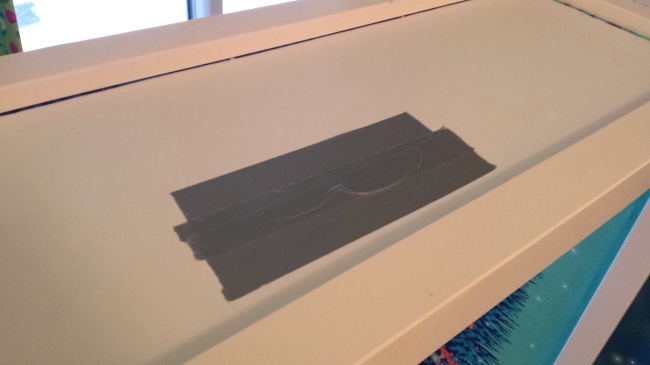
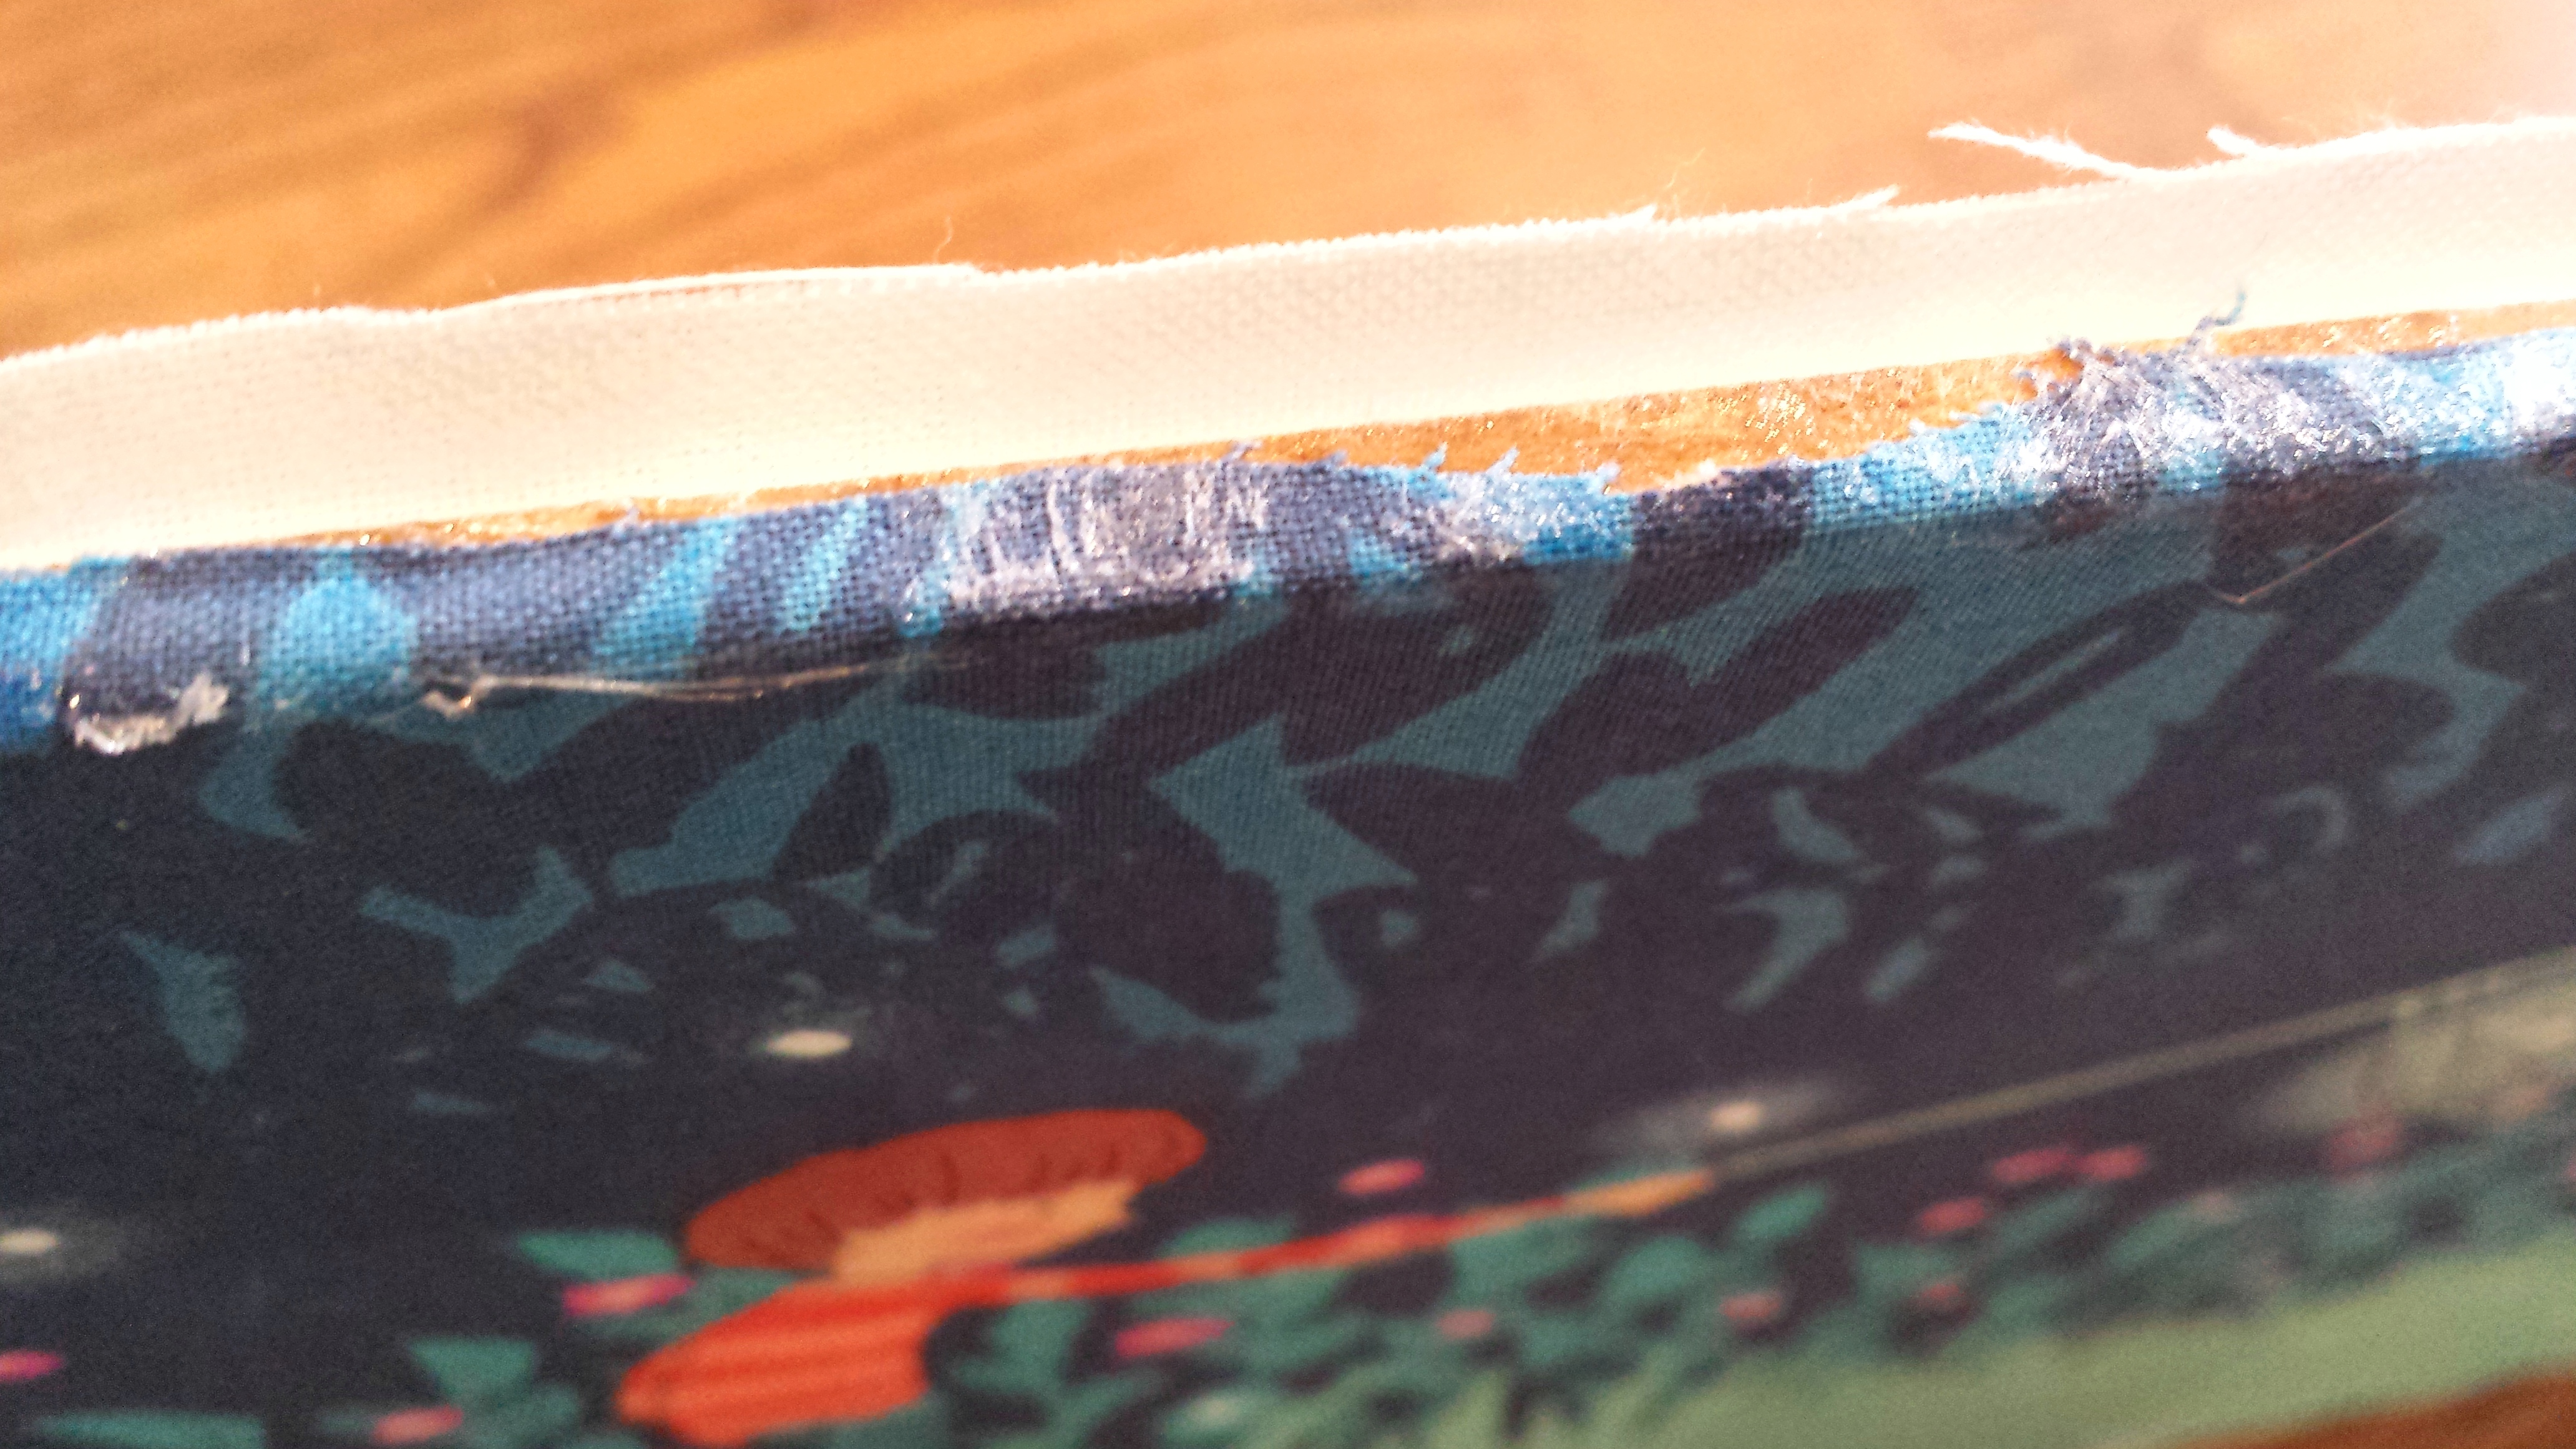
Survival Tip #2 — If you accidentally and inexplicably knock a hole into one of your panels, don’t panic. Just cover it with duct tape and pretend it never happened. Here you see the back of the panel that goes against the wall, so no one ever sees it anyway 🙂
Then, trouble arose. When I tried to slide the panels into the grooves on the frame, the gd things didn’t budge. The addition of the fabric and the glue made them too thick for the grooves. Double crap.

I took a deep breath and ran like the wind to the hardware store, where a very well meaning clerk suggested I purchase a Drummel Tool, with which I could allegedly plane the grooves to be wide enough to accommodate the now thicker panels. Ok.
This did not go well. If you’ve ever used a Drummel Tool (I had not, obviously), it’s like a crazy strong and (if you’re me) uncontrollable electric knife. As soon as I touched the blade to a frame piece, wood shaving flew every which way and I managed to gouge up the thing in a terrible way. I tried again. It was worse. I was afraid that three things would happen if I continued . . . 1) I’d ruin the bed, 2) I’d gouge up the wood floor in Lulu’s room, and 3) I’d maim myself.
Emergency Distress Call to Handyman #2 — Dear Handyman, can you please, please, please come and take back these frickin pieces of wood frame that you already painted and take them to your shop where you can properly plane them so that I can fit these panels in without anyone getting hurt??? Answer — yes. (He took a panel with him so that he would know how much planing needed to happen.)
Once I got the planed frame pieces back from the most excellent, talented and patient handyman, things went much more smoothly.
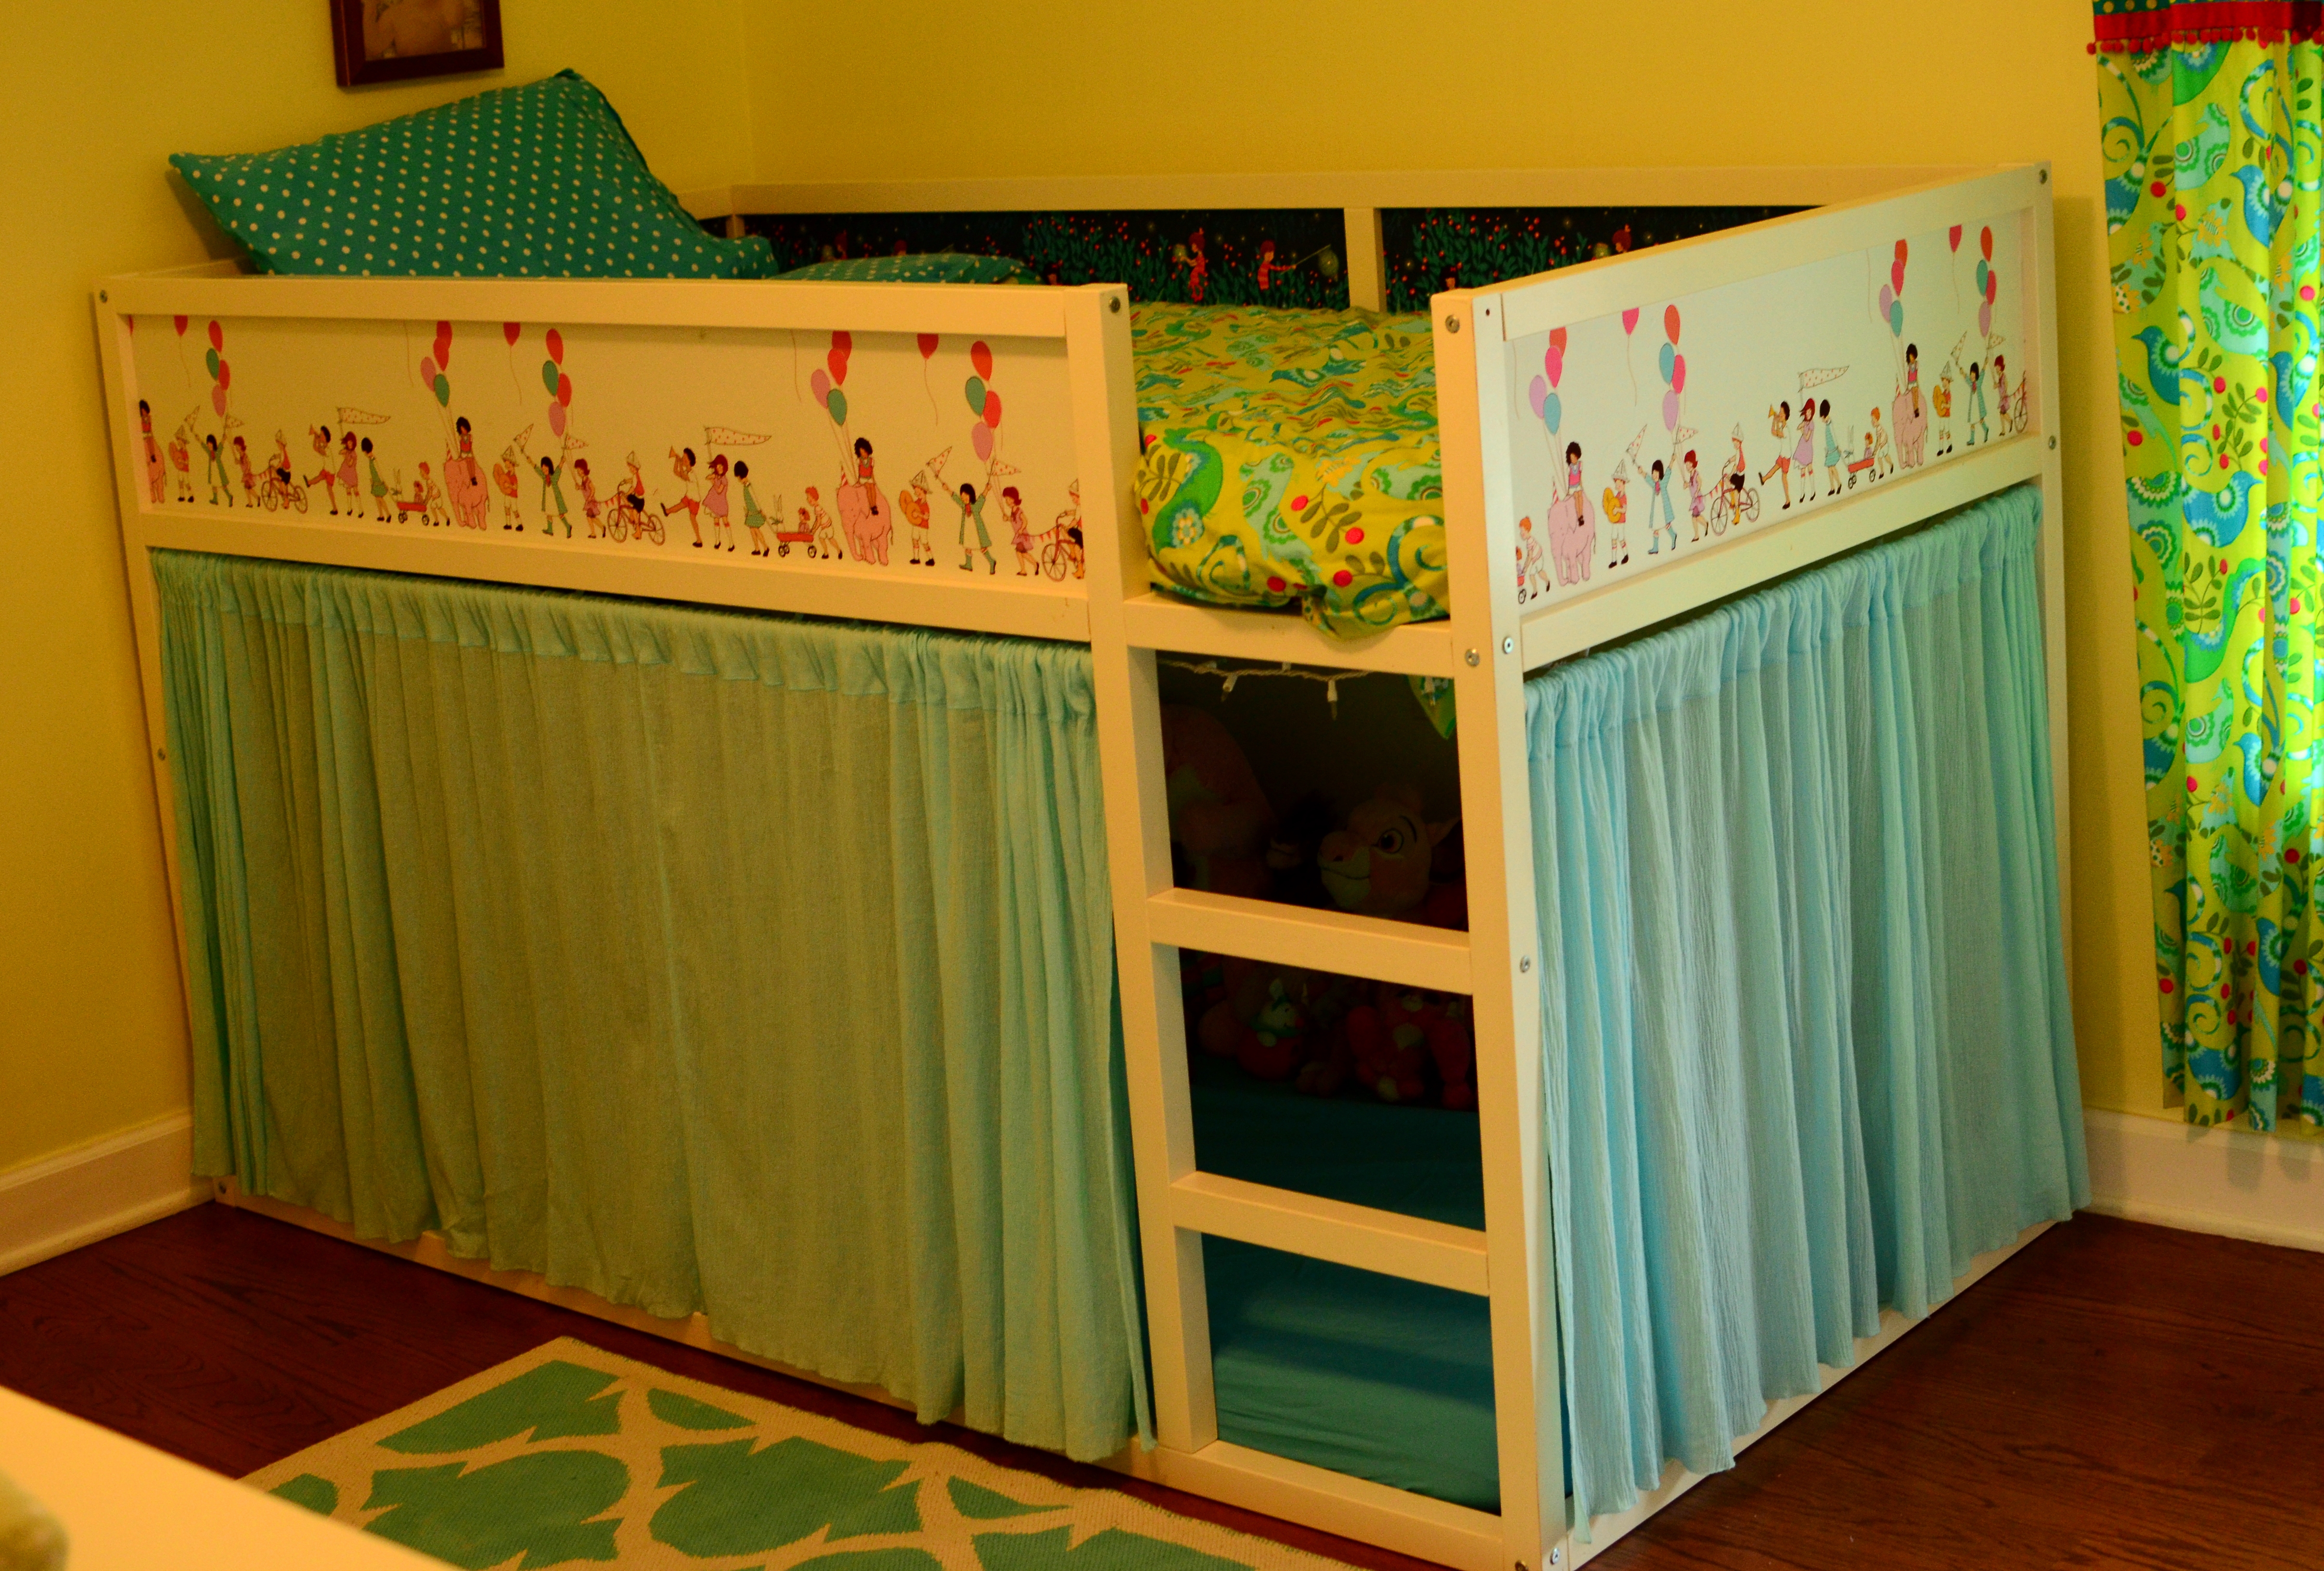
After the bed was all assembled, I realized that two things were missing . . . lights and curtains, of course!

The curtains are just panels of $3/yard cotton gauze with a rod pocket sewn on top and zig-zagged edges attached with tension rods. The rods do get pulled down periodically, but I haven’t come up with a better method. No big deal.
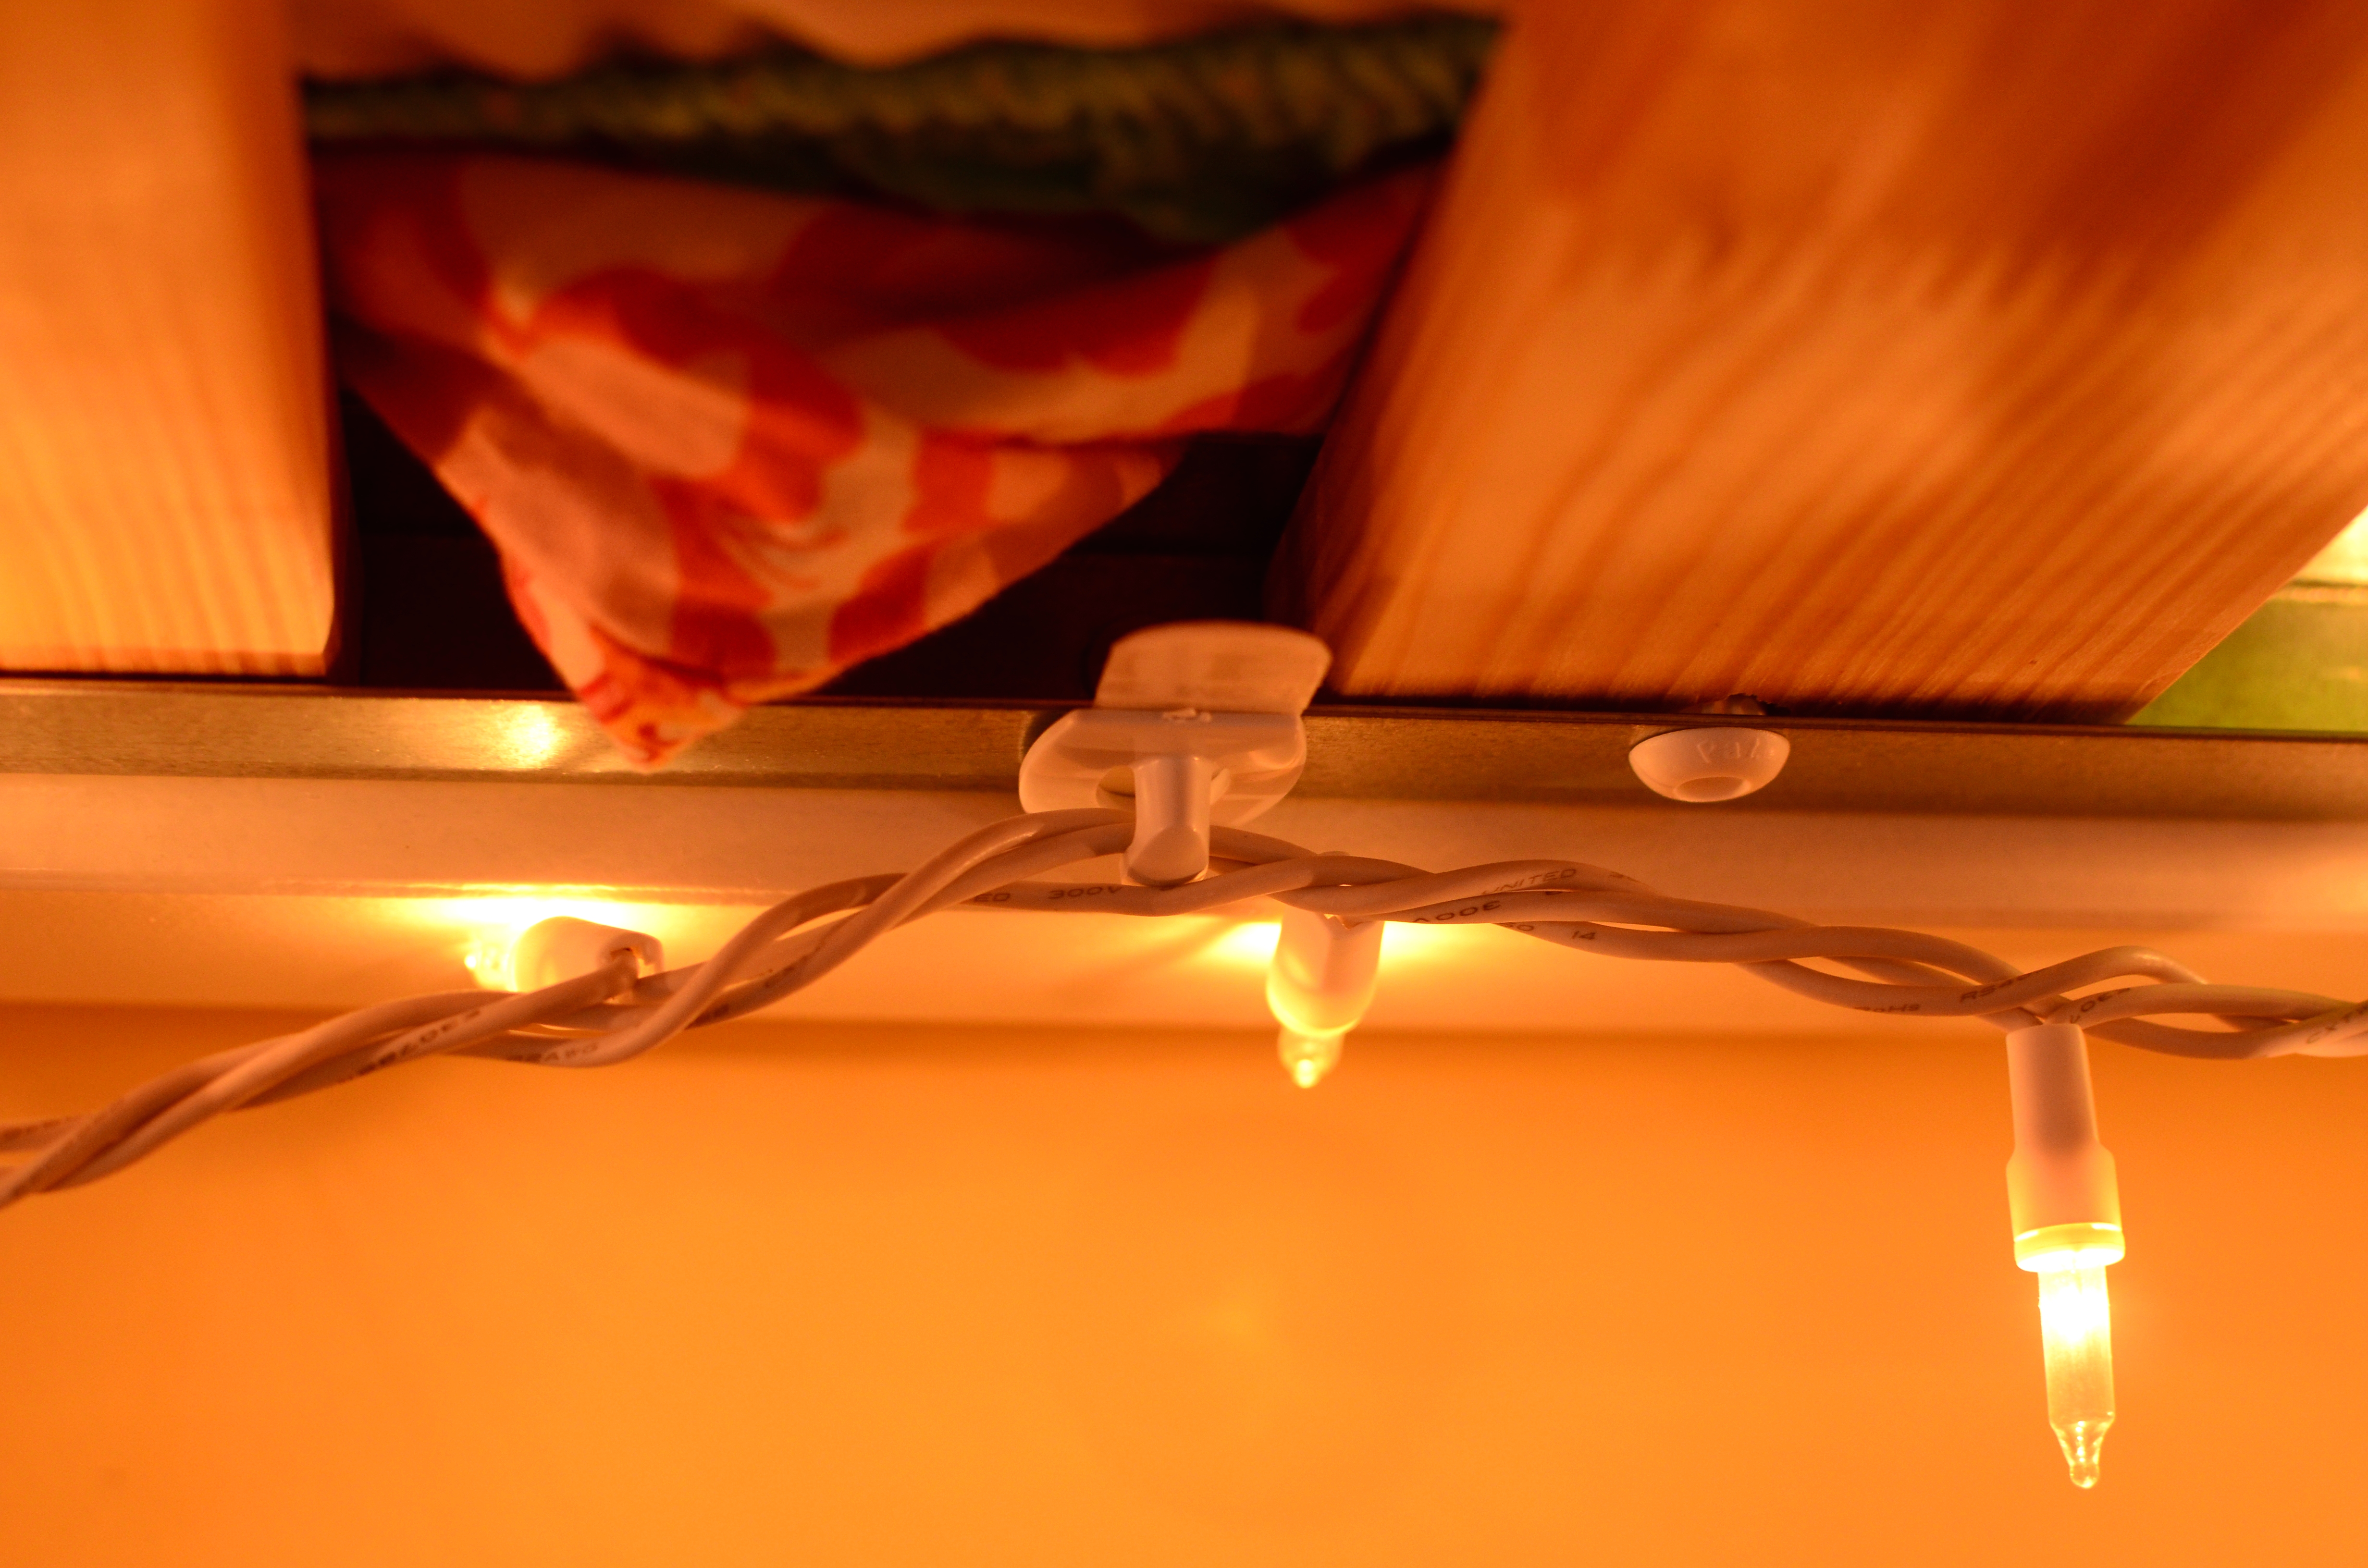
The lights are attached with 3M Command hooks. Aren’t those things just so handy?

Here’s Lulu’s bed from underneath . . .

It’s pretty fun!


Now that Lulu’s bed was all done, I got to do it all over again for Kiki — but this time without the steep learning curve.


Kiki opted for lights, but no curtains.

As my own mother often says “I wouldn’t do this for anyone else.” This is love, my friends!
You might think this is the end of the saga of the beds. But surprisingly, in the immortal words of Elephant & Piggie . . . “There’s more to my story!!!”
Stayed tuned for the next installment . . .

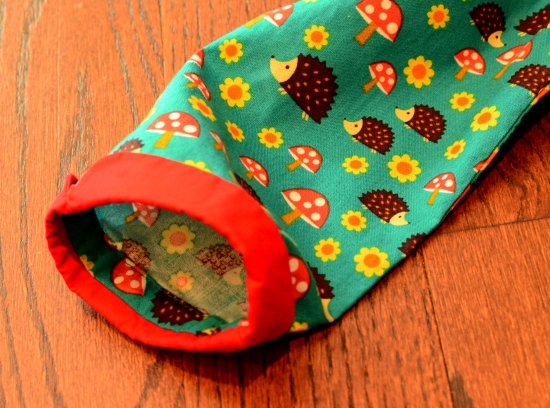
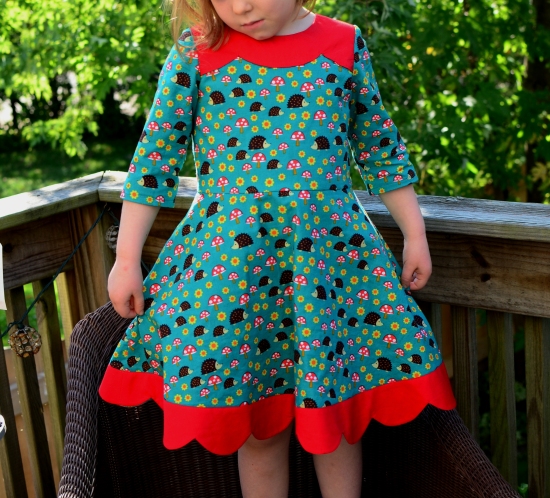
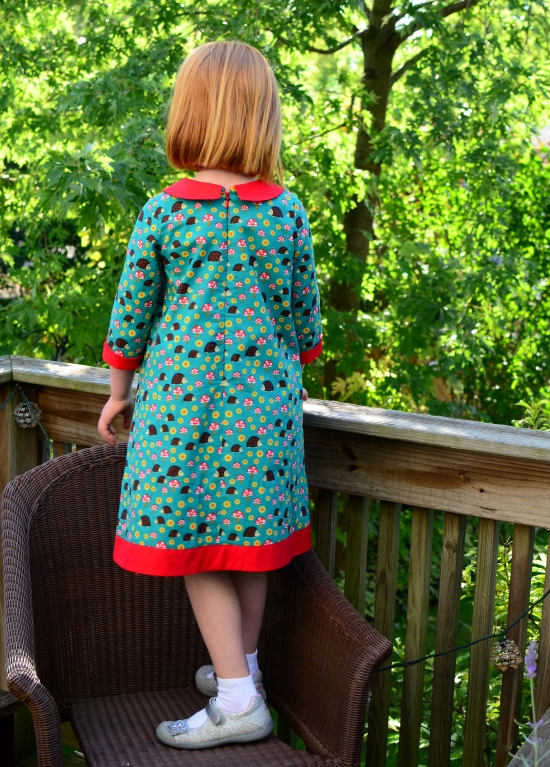
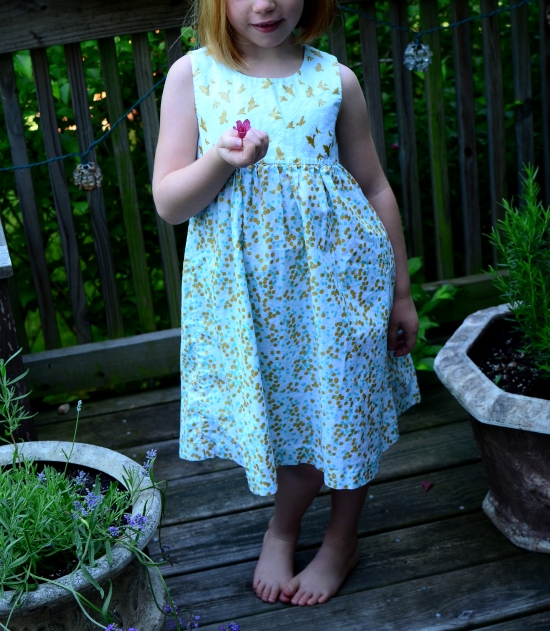
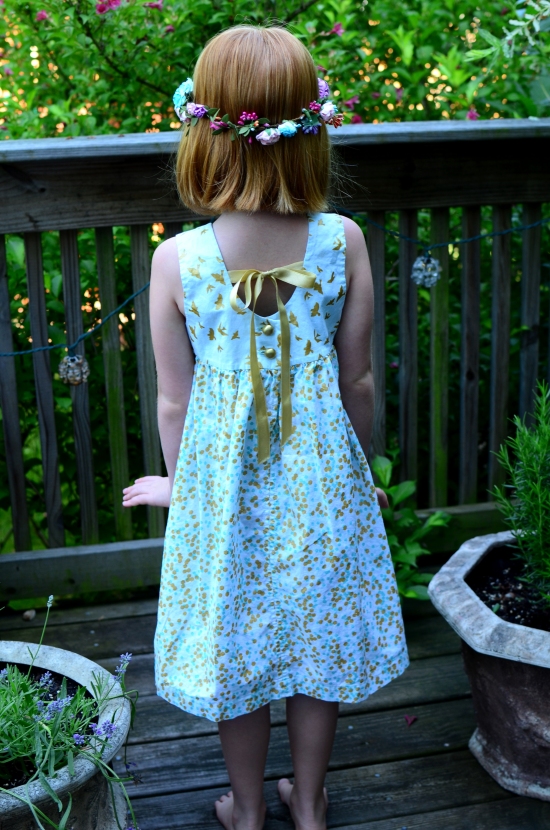
 Kiki chose an A-line dress with the very cute tie collar, cuffs, external hem facing and invisible zipper. Lulu chose the basic silhouette with a shaped yoke, scallop external hem facing and invisible zipper. I asked Lulu if she wanted cuffs, and she said “No way!” Ok then 😉


 If you visit this blog much, you may recognize this wondrous
 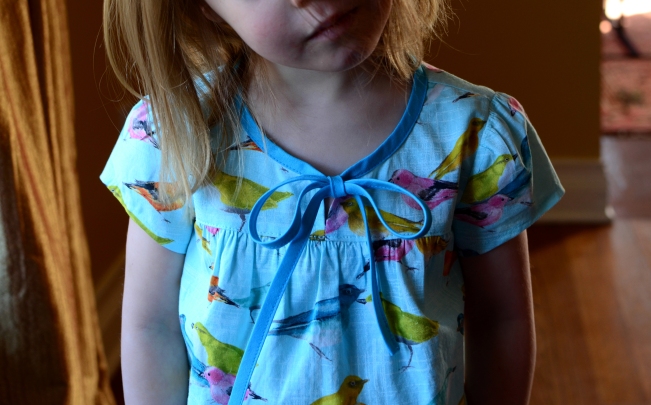 I’ve sewn a ton from this book and am nowhere near finished with it. I have made this blouse
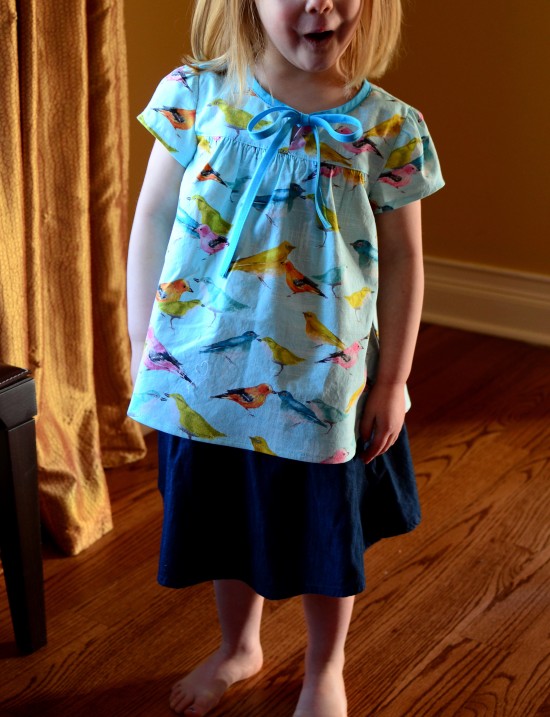
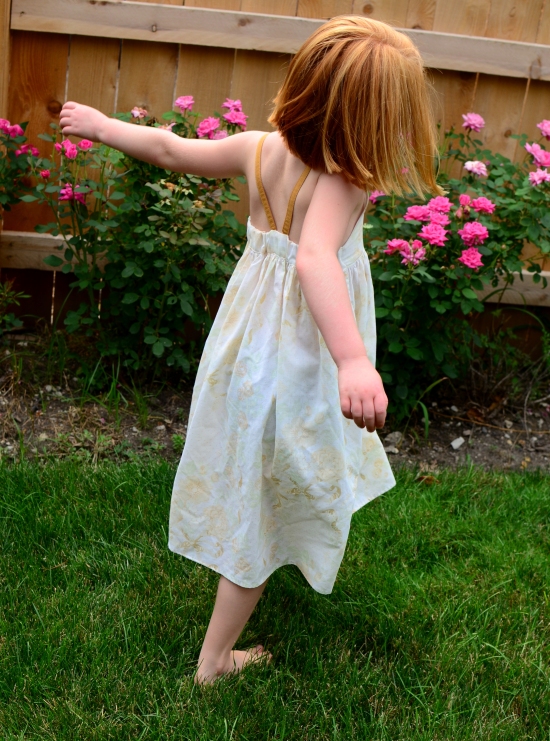
 Lulu’s measurements lie somewhere between a size 2 and size 4. I tried on the