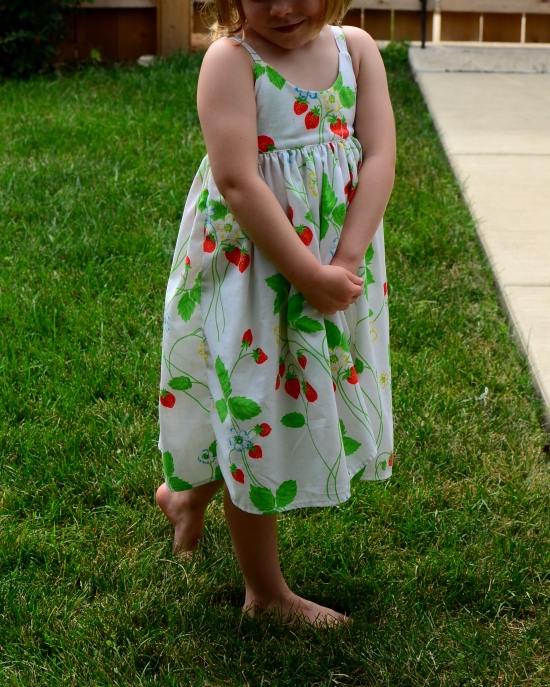
In honor of Selfish Sewing Week, I bring to you not just one, but two incarnations of the Laurel by Colette. One is the Laurel in dress form in Anna Maria Horner Pretty Potent Echinacea in rayon challis. The other is a blouse version in Nani Iro double gauze. (Full Disclosure: I made the top a couple of weeks ago — but the dress is a 100% Selfish Sewing Weeker, cut out on Monday and finished on Friday.)
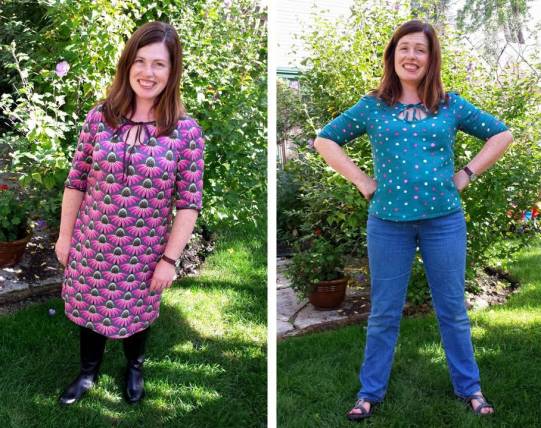
(Yes, it’s weird to see two photos of yourself side by side. One is awkward enough, but this is just over the top.)
I’d like to start by saying that this pattern is the bomb. All three times I’ve made this (there was another top made last spring), I’ve cut out a size 8, and the fit has been spot on with no futzing at all. There are horizontal darts at the bust and vertical darts in the back that give just enough fit to be flattering, but is forgiving enough to be easy to wear.
If you’re thinking of making your own Laurel, I highly recommend getting yourself a 1/2 inch Clover bias tape maker. To make the keyhole neckline version, you need about 4 yards of the stuff, so don’t fool around.
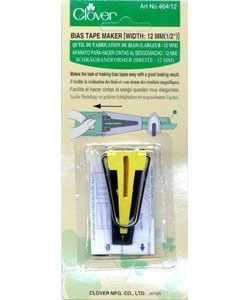
I had several of these in various sizes before starting my first Laurel, but somehow none of them were 1/2″. Crap. Instead of waiting until I could get my hands on the right tool (which would have been the right thing to do, but I’m incapable of waiting once I’m ready to start something), I decided to make the bias tape the old fashioned way — folding the whole thing in half, pressing, folding one edge in toward the center, pressing, folding the other edge in toward the center, pressing, then folding the whole thing in half and pressing again.
After singeing my fingers numerous times in the steam and contemplating killing myself a time or two before getting through the several yards of bias tape required, I vowed never to do that again. So, I ordered the bias tape maker in the proper size this time, and voila — in no time I had a huge amount of perfectly folded and pressed bias tape without any burns or thoughts of suicide.

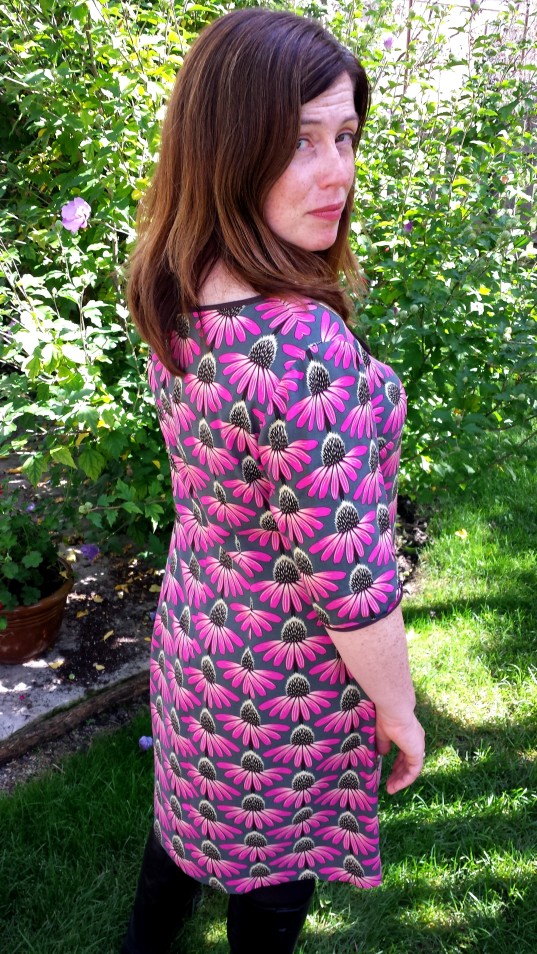
As soon as I saw this echinacea print in rayon, I knew I was destined to make a Laurel Dress with it. Rayon challis has a fab drape, totally perfect for dresses and tops. It’s a little on the slippery side, so you have to be on your toes when cutting and pinning. But otherwise it’s a no brainer — throw it in the washing machine on delicate, dry it on low, and it looks spiffy as soon as you pull it out of the drier — my kind of fabric. When the Pretty Potent line came out this summer, I was so happy to see some rayon in the mix. These echinachea blooms are so gorgeous — they make me think of the sound of cicadas in the last evenings of summer.
Another cool thing about Laurel is that the folks at Colette provide a free e-book of full of fantastic variations with photos and complete instructions. I decided on the keyhole neckline variation on both the top and dress. (The original pattern has a plain neckline finished in bias tape.) For the dress, I did cut the keyhole about an inch shorter than the pattern piece included in the e-book. As you will soon see, the original size of the pattern piece produces a rather plunging view through the keyhole on me 🙂

Another plus with the keyhole neckline is that you have a great excuse to finish all that bias tape with your machine, rather than hand stitching it, which is what Colette recommends for the plain neckline. I mean, you could machine finish the plain neckline too and no one would be the wiser — but it’s nice to not feel like you’re cheating.
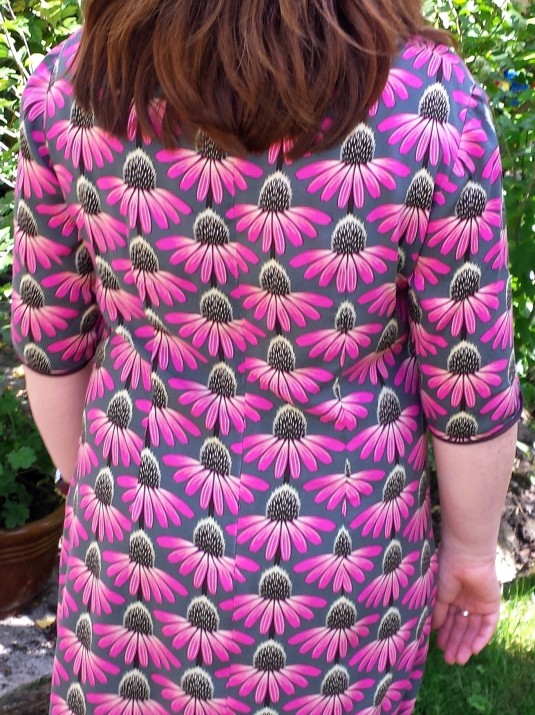
Here’s the tricky part . . . I knew I wanted to be sure to match the print in the back center seam, so as not to have hacked-up flowers all the way down the back. I was pretty nervous about it. Between the slipperiness and the invisible zipper, I wasn’t sure I’d be up to the job. But, I gathered up my courage, re-read this cool tutorial, and went for it.
I spent about ten times longer cutting those back pieces than I have for any other project. I could literally feel the sweat coming down as the rotary cutter met the fabric. I was so relieved when it came out pretty well — not perfect, but good enough for me.
And, it must be said that invisible zippers are nothing to fear, as long as you have a handy invisible zipper foot (which is not the same as a regular zipper foot). The pattern instructions send you to a a great tutorial on the Colette site, complete with photos, written instructions and a super video that really take the mystery out of the whole thing.
One more thing I’ll tell you about this dress is that I used a blind hem for the first time. The instructions advise you to do it by hand. But I happen to have a brand new blind hem foot, so I thought I’d give it a go. I also checked out this tutorial for moral support. Turns out that it’s easy and pretty darn cool.
So, with the mostly matched up print in the back and the fact the husband says I rock this dress, I’m pretty happy.
Now for the top . . .
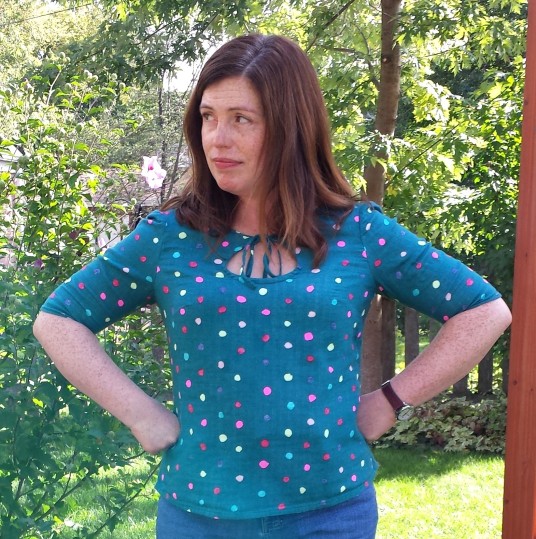
I, like everyone else in sewing world, think that double gauze is dreamy. This is a very nice way to use it. However, I would not recommend using it for that famous bias tape. I did it here, because I couldn’t find a solid that was just the right color, and I didn’t want to take away from the awesomeness and subtle coloration of those dots. Maybe things would have gone better if I had used spray starch — but folding it, pressing it and sewing it was pretty much a thready nightmare. And, truthfully, my new bias tape maker hadn’t been ordered yet, so you know what that means. I prefer to forget the whole experience.
But, once I got passed all that, it was lots of fun to put together. No patterns to match, no zippers to install, no loss of sleep.

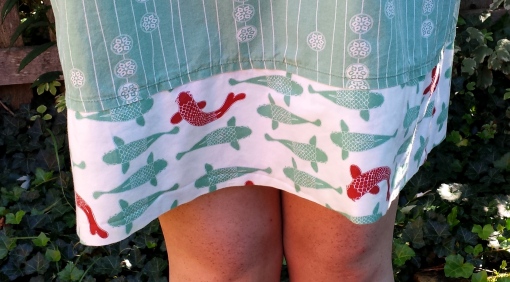
Oh, and here’s what happens when I use the full length of the keyhole cutout pattern piece . . .

The ties obscure things a bit, but suffice it to say that I will avoid standing next to any very tall persons while wearing this top.

So that’s my story about Laurel. I hope you had fun sewing something fabulous for yourself this week!


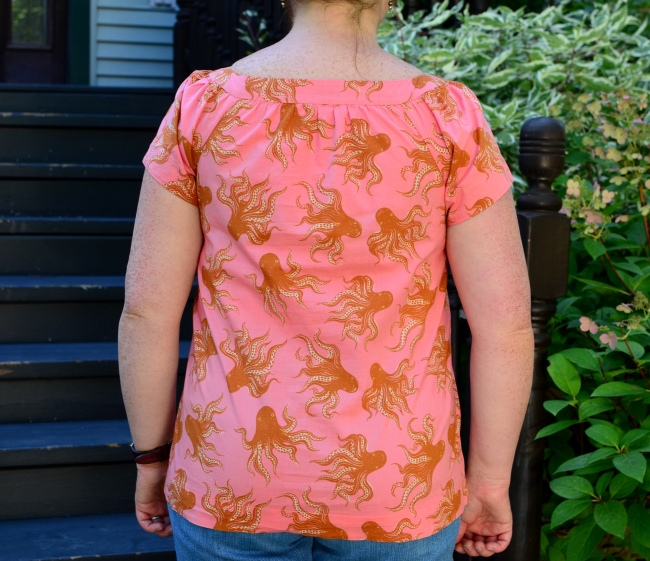 I sewed up a medium, and it is a little bit tighter under the arms that I’m used to, but I think it’s supposed to be like that — and it didn’t take long to get used to it. However . . . I have to say that looking at this photo makes me think that the arms may need some tweaking next time around. Ah well.